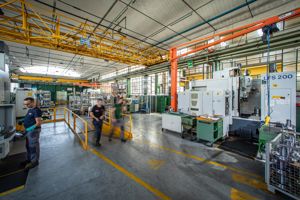
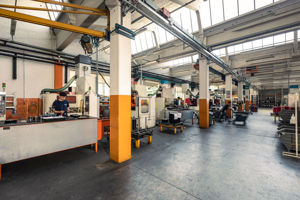
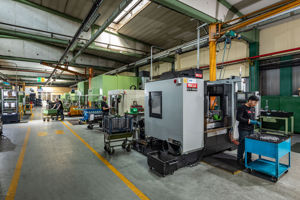
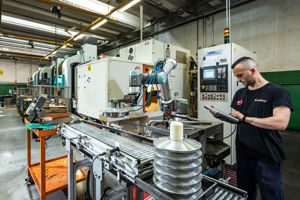
A production area equipped with more than 300 machines, a seventy-year history of passion for mechanical machining: from the design to the delivery of the component on the production line, our service stands out for its passion, know-how and completeness.


Three production sites located in the province of Varese, more than 100 employees employed in production activities, 300 machines for the most diversified processes in terms of type and size: this is Lavorazioni Meccaniche Cavaria, the Chiaravalli Group company dedicated to the creation of components starting from the customer's design, up to delivery on the production line.
A job possible thanks to an innovative infrastructure but fueled by a passion that has spanned two centuries remaining unchanged despite a constantly changing world.
| PROCESSING | NUMBER OF MACHINES |
| BROACHING | 10 |
| MILLING - WORK CENTERS | 2 |
| GEAR SHAPING < 100 | 2 |
| GEAR SHAPING < 1000 | 1 |
| GEAR SHAPING < 300 | 2 |
| GEAR SHAPING < 500 | 12 |
| GEAR SHAPING < 700 | 3 |
| SLOTTING < 100 | 1 |
| SLOTTING < 200 | 8 |
| HELICAL SLOTTING < 500 | 4 |
| BEVEL GEARING < M2 | 3 |
| BEVEL GEARING < M4 | 6 |
| BEVEL GEARING < M5 | 1 |
| BLADE DISTENSION | 2 |
| BLADE DRILLING | 1 |
| 5-AXIS MILLING | 7 |
| TWIN-SPINDLE MILLING | 2 |
| VERTICAL SINGLE-SPINDLE MILLING | 3 |
| HORIZONTAL MILLING 600 | 5 |
| HORIZONTAL MILLING 800 | 2 |
| VERTICAL MILLING WITH DIVIDER | 7 |
| WASHING | 2 |
| TOOL ROOM WORK | 8 |
| GEAR GRINDING < 300 | 4 |
| HORIZONTAL GRINDING | 1 |
| SANDBLASTING | 7 |
| BLADE SANDBLASTING | 1 |
| DEBURRING / GRATOMAT | 2 |
| EMAG TURNING | 23 |
| HORIZONTAL TURNING < 300 | 4 |
| HORIZONTAL TURNING < 500 | 3 |
| HORIZONTAL TURNING < 600 | 5 |
| SINGLE-SPINDLE HORIZONTAL TURNING < 300 | 20 |
| VERTICAL TURNING < 1000 | 8 |
| VERTICAL TURNING < 500 | 2 |
| TOOLING | 7 |
184361
Quality is a value rather than an objective: we combine a meteorological room dedicated to quality control with the most advanced ZEISS instruments to the procedures of constant control and search for processes that meet the highest standards.
The components are checked and measured after each step in order to guarantee constant monitoring of the processes carried out on the product.

| Number of Machines | Details | |
|---|---|---|
| ZEISS - 3D | 9 | Max dimension: 1200 X 1800 X 800 |
| Gleason Tester | 5 | Max diameter: 400mm |
| Profilometer | 5 | |
| Hommel (Optical Shaft Measuring Technology) | 2 | Max lenght: 1000mm |
| Our Quality Control LAB perform both destructive and non-destructive analysis. | ||